Tuesday, May 31

Flourless Chocolate Cake

Today: Flourless Chocolate Cake

Two things have happened since my last post: my parents got a standing mixer, and my computer imploded.

Well, maybe it didn't literally implode.  I got a virus, and a pretty bad one at that.  My dad had noticed it when he was teaching me how to operate Photoshop, and said that we'd have to deal with it soon.  Later that night, I was searching around baking websites for new recipes when a window popped up saying that Flash had crashed.  I ignored it, and exited out of it.  It immediately popped back up.  After about 15 more attempts to exit out of this window, I became frantic.  This was clearly not an error notice about Flash.  So, I decided just to shut down the computer and make a mental note to tell my dad in the morning, since he was already asleep.

The next morning, my dad woke up and remembered that he was going to take a look at my computer.  He went downstairs and saw my laptop sitting out.  Perfect!  Now he could check on it.  As soon as he turned it on, a window popped with a "Windows Error Report".  You should know at this point in the story that my dad works for a computer company, majored in computer science, and generally just knows a lot about computers.  Being the computer genius that he is, he knew that this "Windows Error Report" doesn't exist. He immediately got to work on de-bugging my computer, which was a long, tedious process but eventually also a successful one.

Unfortunately, that wasn't the end of our problems.  Apparently in getting rid of the virus, my user profile had also been corrupted.  Basically, my files were all still on my computer, but they didn't show up in any of the libraries or the start menu.  You'd have to search for each individual file to get them.  So, my dad ended up backing up all my files on an external hard-drive and then wiping my computer clean and re-installing every program.

Moral of the story: I made this cake a few days ago, but haven't been able to post because my computer hates me.

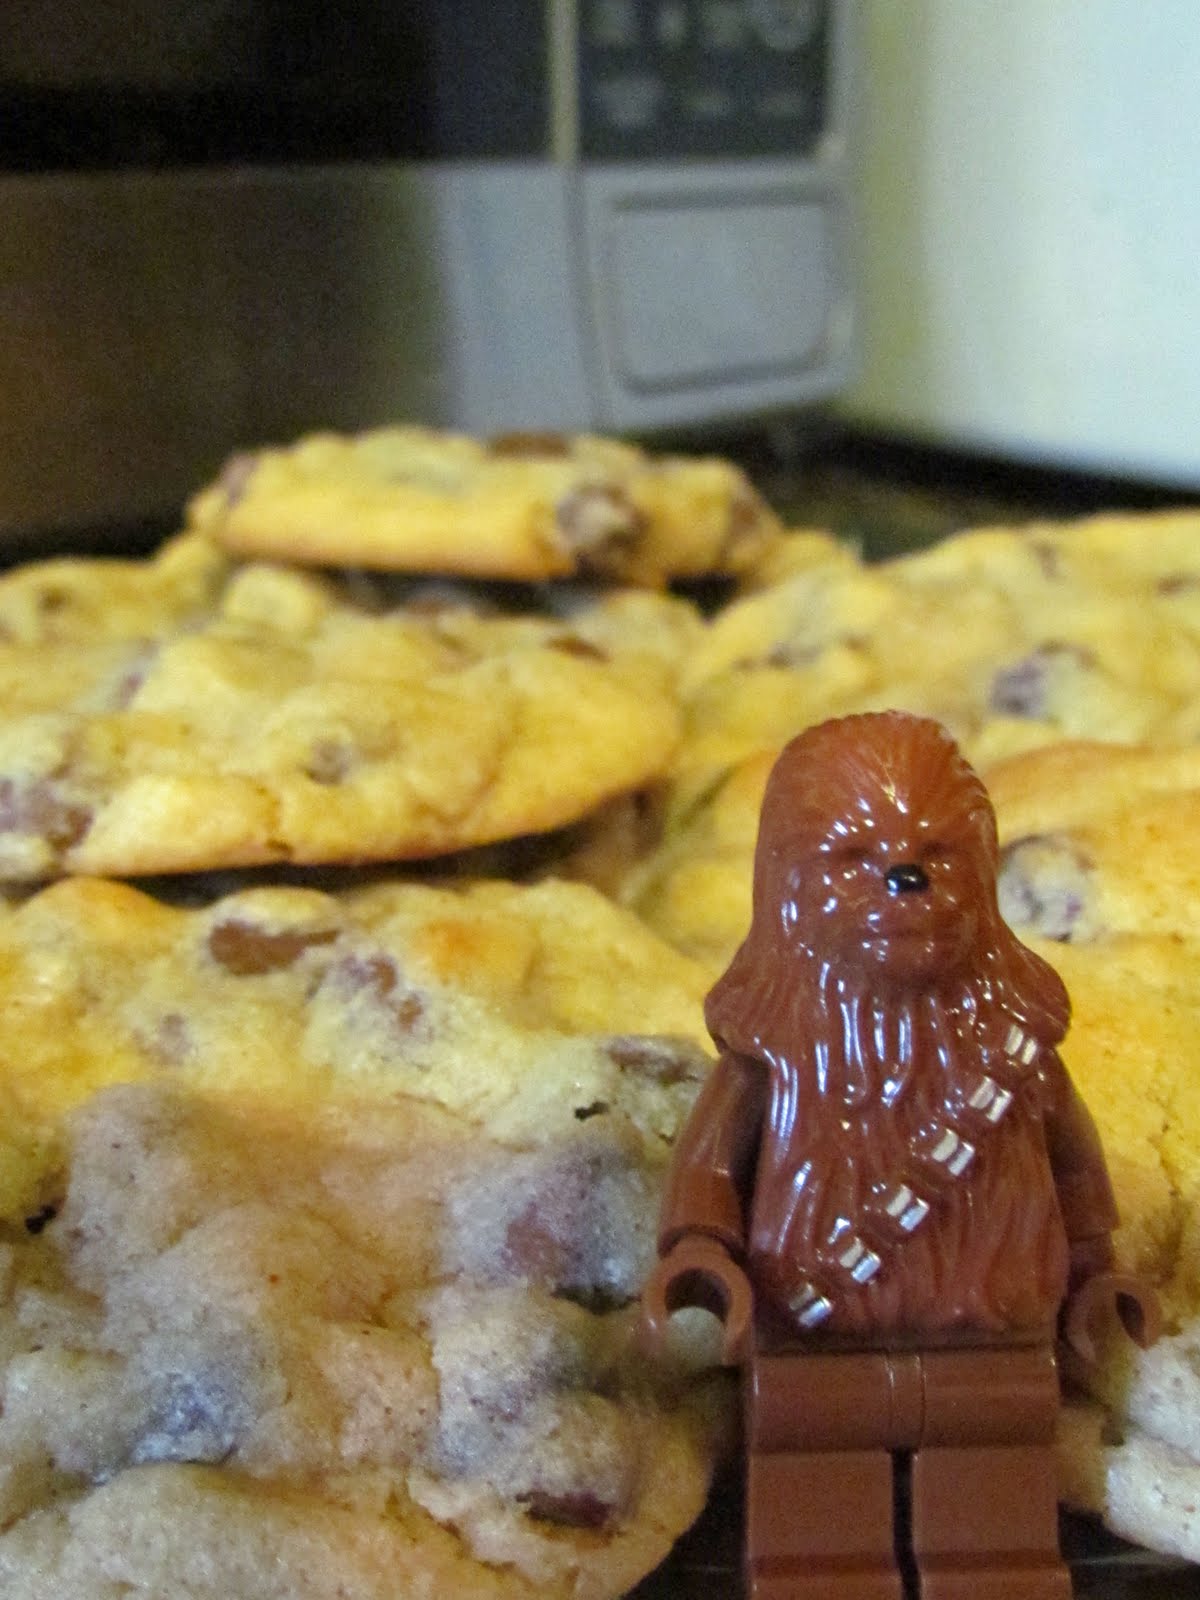
Now, on to the fun stuff.  I came home from my friend Jill's house after baking some Wookie Cookies and there it was, in all it's shiny, baked-goods-loving glory: a standing mixer.  I immediately texted Jill with about 15 "OH MY GOD"s and "MY PARENTS BOUGHT A STANDING MIXER!".  The entire text was in caps.  I read the entire manual that night, even the instructions for attachments that we don't have, and probably never will.  This glorious new mixer deserved a special assignment, so I decided to bake something fancy, something sophisticated: Flourless Chocolate Cake.

LOOK AT THIS BEAUTY!!!

This Flourless Chocolate Cake recipe is from my favorite new cookbook, BAKED: New Frontiers in Baking.  For those of you who don't know, flourless chocolate cake is a dense, fudgy cake that is almost like a giant brownie. Since I've always preferred a brownie to a cake, it's my perfect dessert.  And what a great thing to serve to my family on Memorial Day!

I served this cake with a chocolate ganache glaze, but after eating it, I'd recommend simple dusting it with powdered sugar instead and serving with vanilla ice cream. It'd cut down on the cost as well. You could also serve it plain or with whipped cream.

Preheat your oven to 350.  Generously butter the sides and bottom of a 9-inch springform pan.  Line the bottom of the pan with parchment paper and then butter the parchment paper.  Melt 10 ounces of dark chocolate (I'd suggest 60-70% Ghirardelli baking chocolate), coarsely chopped, over medium heat and set aside to cool.  Beat together 10 tablespoons butter and 1 cup granulated sugar on high speed until light, pale, and thoroughly combined (about 5 minutes).

Butter and sugar, light and fluffy
 Separate 7 eggs, and add the egg yolks, one at a time, to the butter/sugar mixture, beating well after each addition (keep the egg whites!).  After all the egg yolks have been incorporated, scraped down the bowl and beat for 10 more seconds.  Add cooled chocolate and mix thoroughly until combined.  Scrape down the bowl, add 1 tsp vanilla, and beat until just incorporated.

In a large bowl, whisk the egg whites and 1 tsp salt until stiff peaks form.  Use an electric mixer fit with a whisk attachment for this unless you are Superman or some sort of egg-whisking machine.  Scoop 1 cup of the egg whites into the chocolate mixture.  Use a rubber spatula to gently fold the egg whites into the mixture.  After about 30 seconds of folding, add the rest of the egg whites and gently fold into the chocolate mixture until almost completely combined.  Work slowly - do not rush the folding process.

Fold in the egg whites
Pour the mixture into the prepared pan and use an offset spatula to smooth the top.  Bake for 30 to 35 minutes, until the top of the cake seems set or firm to the touch.  Be careful not to overbake this cake.

Mmmm... smell those 10 ounces of chocolate!
Transfer to a wire rack to cool completely (this will take a while, I'd suggest having it cool overnight).  Once cool, use a small knife to loosen the cake from the sides of the pan.  Remove the springform sides.  Invert the cake onto the rack and peel off the parchment.  Take out another wire cooling rack, place it on the bottom of the cake, and flip the cake so that it is upright on the second wire rack.

If you are dusting with powdered sugar or topping with whipped cream, you're done! Congrats! If you want to use the ganache glaze, keep reading.

Put 9 ounces of dark chocolate, coarsely chopped, into a large heatproof bowl and set aside.  In a small saucepan over medium heat, combine 1/2 cup heavy cream and 1/4 cup light corn syrup and bring just to a boil.  Remove from the heat and pour the cream mixture over the chocolate.  Let stand for 2 minutes, then, starting in the center of the bowl and working your way out to the edges, slowly stir the chocolate and cream mixture in a circle until the chocolate is completely melted and the mixture is smooth.  Whisk for another few minutes to cool the ganache slightly.  If desired, add 1 tbsp of coffee-flavored liqueur (such as Kahlua) and whisk again (I skipped this step).

Chocolate Ganache Glaze
Line a baking sheet with parchment paper, place the cake on a wire rack, and place the wire rack over the baking sheet.  Slowly pour 3/4 cup of the ganache over the cake.  Use an offset spatula to smooth out to the edges.  Work quickly with the ganache to prevent it from hardening.  The ganache should not cover the sides of the cake at this point.

First Layer Glaze
Place the cake in the freezer for five minutes to set the ganache.  Remove the cake from the freezer and slowly pour the rest of the glaze over the cake.  It should run down the sides and cover the cake completely.  Mine was very thick, so it didn't run very much.  Smooth with an offset spatula and work quickly, as the ganache will harden quickly.

Finished Product!
Chill the glazed cake for 2 hours, or until the glaze is set, then transfer to a cake plate.  Serve at room temperature.


You are great! You made a chocolate cake!

Topped with ice cream, this makes a fantastic treat.


Flourless Chocolate Cake by BAKED

Ingredients:
10 ounces dark chocolate (60 to 70% cacao), coarsely chopped
10 tablespoons unsalted butter, softened
1 cup sugar
7 large eggs, separated
1 teaspoon pure vanilla extract
1 teaspoon salt


Preheat your oven to 350.  Generously butter the sides and bottom of a 9-inch springform pan.  Line the bottom of the pan with parchment paper and then butter the parchment paper.  Melt 10 ounces of dark chocolate (I'd suggest 60-70% Ghirardelli baking chocolate), coarsely chopped, over medium heat and set aside to cool.


Beat together 10 tablespoons butter and 1 cup granulated sugar on high speed until light, pale, and thoroughly combined (about 5 minutes).  Separate 7 eggs, and add the egg yolks, one at a time, to the butter/sugar mixture, beating well after each addition (keep the egg whites!).  After all the egg yolks have been incorporated, scraped down the bowl and beat for 10 more seconds.  Add cooled chocolate and mix thoroughly until combined.  Scrape down the bowl, add 1 tsp vanilla, and beat until just incorporated.


In a large bowl, whisk the egg whites and 1 tsp salt until stiff peaks form.  Use an electric mixer fit with a whisk attachment for this unless you are Superman or some sort of egg-whisking machine.  Scoop 1 cup of the egg whites into the chocolate mixture.  Use a rubber spatula to gently fold the egg whites into the mixture.  After about 30 seconds of folding, add the rest of the egg whites and gently fold into the chocolate mixture until almost completely combined.  Work slowly - do not rush the folding process.


Pour the mixture into the prepared pan and use an offset spatula to smooth the top.  Bake for 30 to 35 minutes, until the top of the cake seems set or firm to the touch.  Be careful not to overbake this cake.


Transfer to a wire rack to cool completely (this will take a while, I'd suggest having it cool overnight).  Once cool, use a small knife to loosen the cake from the sides of the pan.  Remove the springform sides.  Invert the cake onto the rack and peel off the parchment.  Take out another wire cooling rack, place it on the bottom of the cake, and flip the cake so that it is upright on the second wire rack.


Chocolate Ganache Glaze by BAKED

Ingredients:
9 ounces dark chocolate (60-70% cacao), coarsely chopped
1/2 cup heavy cream
1/4 cup light corn syrup
1 tablespoon coffee-flavored liqueur (optional)


Put 9 ounces of dark chocolate, coarsely chopped, into a large heatproof bowl and set aside.  In a small saucepan over medium heat, combine 1/2 cup heavy cream and 1/4 cup light corn syrup and bring just to a boil.  Remove from the heat and pour the cream mixture over the chocolate.  Let stand for 2 minutes, then, starting in the center of the bowl and working your way out to the edges, slowly stir the chocolate and cream mixture in a circle until the chocolate is completely melted and the mixture is smooth.  Whisk for another few minutes to cool the ganache slightly.  If desired, add 1 tbsp of coffee-flavored liqueur (such as Kahlua) and whisk again (I skipped this step).


Line a baking sheet with parchment paper, place the cake on a wire rack, and place the wire rack over the baking sheet.  Slowly pour 3/4 cup of the ganache over the cake.  Use an offset spatula to smooth out to the edges.  Work quickly with the ganache to prevent it from hardening.  The ganache should not cover the sides of the cake at this point.


Place the cake in the freezer for five minutes to set the ganache.  Remove the cake from the freezer and slowly pour the rest of the glaze over the cake.  It should run down the sides and cover the cake completely.  Mine was very thick, so it didn't run very much.  Smooth with an offset spatula and work quickly, as the ganache will harden quickly.


Chill the glazed cake for 2 hours, or until the glaze is set, then transfer to a cake plate.  Serve at room temperature.

Saturday, May 28

Wookie Cookies!

Today: Wookie Cookies
I have a couple of twins.

You've met one: Kristina.  She's not only my twin, but my baking mentor.  Today you get to meet another: Jill.  She also happens to be my best friend.

I met Jill this year at school.  She lived across the hall from me, and even though she's a pretty shy person, one thing is apparent from the moment that you meet her: she loves Star Wars.  Just step into her room for a minute and you'll realize that hers is an obsession that you cannot compete with.  I don't think I've ever met anyone who loves Star Wars more than Jill, and I run in a pretty nerdy crowd.  So, for her birthday, I decided to combine her obsession with mine, and gave her the ultimate gift - a Star Wars cookbook.

Yesterday, Jill and I made our first venture into the world of Star Wars-inspired foods.  We started out small, with these simple and delicious Wookie Cookies.  They taste somewhat like Snickerdoodles combined with Chocolate Chip cookies, with that extra hint of cinnamon and brown sugar.  If you're a Star Wars fan, or just a cookie fan, you must try these.

Before you start, preheat the oven to 375.  In a medium-sized bowl, mix together 2 1/4 cups all-purpose flour, 1 teaspoon baking soda, 1 teaspoon salt, and 1 teaspoon ground cinnamon.  Put 1 cup of unsalted butter (room temperature), 1 cup packed brown sugar, and 1/2 cup granulated sugar into a large mixing bowl and cream with an electric mixer (or, if you're lucky like me, a standing mixer!) for about 3 minutes.  It should be smooth and creamy.

Jill has a standing mixer! What a star!
Beat in 2 large eggs and 1 1/2 teaspoons vanilla extract.  Next, add the flour mixture and stir with a wooden spoon until well blended.  Fold in 1 cup milk chocolate chips and 1 cup semi-sweet chocolate chips.

Roll into 2 tablespoonful-sized balls and place on a greased or lined cookie sheet.  Bake for 10 minutes or until golden brown. 

Fresh out of the oven... delish!
See how simple? 

Look at those gooey Chocolate Chips...
 Enjoy with a nice cool glass of Yoda Soda (lime sherbet and Sprite) for the perfect Star Wars snack.


Wookie Cookies from The Star Wars Cookbook

2 ¼ cups all-purpose flour
1 teaspoon baking soda
1 teaspoon salt
1 teaspoon ground cinnamon
1 cup unsalted butter, at room temperature
1 cup packed brown sugar
½ cup granulated sugar
2 large eggs
1 ½ teaspoons vanilla extract
1 cup milk chocolate chips
1 cup semi-sweet chocolate chips

1. Preheat the oven to 375ยบ

2. Put the flour, baking soda, salt, and cinnamon in a mixing bowl. Stir with the wooden spoon until well mixed. Set aside.

3. Put the butter, brown sugar, and granulated sugar in another mixing bowl. Using the electric mixer set on high speed, beat together until well blended and creamy, about 3 minutes. Beat in the eggs and vanilla extract. Add the flour mixture and stir with the wooden spoon until blended. Stir in the chocolate chips.

4. Scoop up a rounded tablespoonful of the dough and drop onto a baking sheet. Repeat until you have used up all the dough. Be sure to leave about 1 inch between the cookies because they spread as they bake.

5. Using pot holders, put the baking sheets in the oven. Bake until golden brown, about 10 minutes.

6. Again, using pot holders, remove the baking sheets from the oven. Lift the cookies from the baking sheets with a spatula, and place on cooling racks. Let cool completely.
Makes about 3 dozen cookies.

Friday, May 27

UPDATE: Free Baked Goods!

Congrats to those of you who have already signed up to follow my blog! Expect baked goods shortly.

There's one problem: apparently if you're following via Twitter or an RSS bookmark, I don't get updated that you're following me. So, if you've done that, or if you're following but don't see your name under "followers" on the right, please comment on this post with your name and possibly what you would like (or if you want me to surprise you, or if you want some general category like chocolate) and I will get to baking your free treats!

Everyone else, you still have until Tuesday to sign up and receive free baked goods! Don't miss out!

Wednesday, May 25

(Not Just for Vegans) Vegan Chocolate Chocolate Chip Cookies

Today: Vegan Chocolate Chocolate Chip Cookies

I could never be a vegan.

Being a pescetarian (vegetarian + fish/seafood) is difficult enough at times.  But I know, 100%, that I could never be a vegan for two reasons: butter and eggs.  They are a staple in my baked goods, not to mention one of my main sources of protein (the eggs, not the butter).  And we all know I would be a much less pleasant person to be around if I couldn't bake.

Anyway, last night a good friend of mine invited me over to watch the Glee Finale (which was disappointing, by the way).  Perfect!  I thought,  This will give me a chance to bake something new!  Then I remembered something: though my friend is a vegetarian, she prefers vegan desserts.  I was a little skeptical of the whole vegan dessert thing, since I firmly believe that the more butter in a baked good, the better.  But, I decided to give it a shot, and found a recipe on Joy the Baker's website for Vegan Chocolate Chocolate Chip cookies.  And if worst came to worst, I could always ditch the dessert at her house, under the pretense of being nice or something.

Boy, was I surprised to find out how delicious and addicting these cookies are.  They're dense, and taste more like a brownie than a cookie.  They're less sweet than normal cookies, so if you need an intensely sweet dessert, I would add some extra sugar to the recipe.  If you're not a vegan and you're making this, you could also try adding milk chocolate chips or semi-sweet chocolate chips in place of the vegan chocolate chips, and that should add some sweetness to it as well.

Grab a medium bowl, and whisk together 2 1/2 cups all-purpose flour, 1/2 cup unsweetened cocoa power, 1 teaspoon baking powder, 1/2 teaspoon baking soda, and 1/2 teaspoon salt.  Then take out a small bowl, and add 1 cup sugar, 2 tablespoons flax seed meal, 1/2 cup applesauce, 1/4 cup canola oil, 1 teaspoon espresso powder, 1/4 teaspoon cinnamon, and 1 teaspoon vanilla.  The dough can get quite crumbly and difficult to work with, so I think I'd actually add a little extra oil next time, but you can use your discretion.  You should note that normal granulated sugar is not vegan, so if you're going all out, make sure you get vegan sugar.  Also, the applesauce is used as a sweetener here so if you want your cookies sweeter, get sweetened applesauce.


Whisk together until mixed, and then pour, all at once, into the dry ingredients.  Add 1 cup vegan chocolate chips (carob chips), and stir together with a spatula until combined.  The original recipe says until just moistened, but I would make sure that the moisture is evenly distributed, as the dough is very difficult to work with if dry.  Once combined, form into a disk and wrap in Saran Wrap or (my favorite) Press and Seal, and refrigerate for at least 1 hour.

After refrigeration

Once you're ready to bake the cookies, preheat the oven to 350.  Scoop dough by the tablespoonfuls (I made my cookies slightly larger, and it's more difficult for them to hold together if they are big, so I'd suggest keeping them small) and roll in sugar before placing on a cookie sheet.  If the dough is too crumbly to roll (like mine was), just sprinkle sugar over the top.  Be generous with the sugar - these cookies aren't very sweet to begin with.  Bake for 9-10 minutes.  The cookies should be still soft in the middle when out of the oven.  Let cool on the sheets for 5 minutes.  I'd also suggest refrigerating these cookies before eating them.  I actually preferred them out of the fridge the next day.

Enjoy! And remember, vegan desserts aren't only for vegans. If you're not vegan, you can always adapt the recipes to your liking as well.

Yummy cookies!


Original Recipe from Joy the Baker

Ingredients
  • 2 1/2 cups all-purpose flour
  • 1/2 cup unsweetened cocoa powder
  • 1 teaspoon baking powder
  • 1/2 teaspoon baking soda
  • 1/2 teaspoon salt
  • 1 cup sugar (vegan)
  • 2 tablespoons flax seed meal
  • 1/2 cup applesauce
  • 1/4 cup canola oil
  • 1 cup vegan chocolate chips
  • 1 teaspoon pure vanilla extract
Cooking Directions
  • Place a rack in the center and upper third of the oven and preheat oven to 350 degrees F. Line two baking sheets with parchment paper and set aside.
  • In a medium bowl, whisk together flour, cocoa powder, baking powder, baking soda, and salt. Set aside.
  • In a small bowl, carefully whisk together sugar, flax seed meal, applesauce, oil and vanilla extract.
  • Pour the wet ingredients, all at once, into the dry ingredients. Add the chocolate chunks (and sunflower seeds, if using) and stir together with a spatula. The dough will be fairly thick. Stir until all of the dry ingredients are just moistened. You can even use your hands if necessary, but try not to knead and overwork the dough. Dump dough out onto a piece of waxed paper or plastic wrap.
  • Form into a disk, wrap, and refrigerate for one hour (or overnight).
  • Once chilled, scoop dough by the tablespoonful into balls. Roll in granulated sugar, place on prepared cookie sheets, and press them down, just slightly with the heel of your hand. These cookies won't spread much.
  • Bake for 9 to 10 minutes. Cookies should still be slightly soft in the middle. Remove from the oven. Allow to cool on the baking sheet for 5 minutes, before removing to a wire rack to cool completely. Cookies will keep, in an airtight container, at room temperature, for up to 5 days.
**For extra deliciousness:  add 1 teaspoon instant espresso powder and 1/4 teaspoon ground cinnamon to the dry ingredients, sift together, and proceed as recipe instructs.

Tuesday, May 24

KP adventure: Key-lime Pies and Kim Possible

Today's menu: Mini Key Lime Pies. 


Look! Look over there! To the right! ---------------->

You see the link that says followers? Well right now, it's stuck at a sad, measly one (shout out to you, Matt Montan!). So, here comes the shameless begging. Follow me! You'll get emailed whenever I post something new.  And, to make it worth your while, I'm going to add a sweet incentive.  For the next week only, I will bake something for everyone who signs up to follow me, and either mail or hand-deliver it within a month of you signing up.  That's right, FREE BAKED GOODS.  And you don't even have to leave your dwelling.  You can request whatever you would like, and I will do my best to accommodate you.  Montan, for being first, I'll bake for you twice.  Now on to business.

I think I'm about 8 years old at heart.

I color frequently.  My favorite gift for my birthday this year was a stuffed elephant named Reginald.  I bought a VCR from Goodwill this year when my old VCR broke down, because all of my Disney movies are on VHS, and that's pretty much all I watch.  I have had Magic School Bus and Wishbone marathons this year at school. And I love, love, love Kim Possible.

Kim Possible is a great show for so many reasons.  It's witty, which is something I can appreciate even more as an adult than I could as a child.  It has amazing character development, and does a great job of connecting plots between episodes.  It gets better as the seasons go on, which is also surprising for an animated series.  Most people my age haven't seen the last season of Kim Possible because it aired at a time when we were too old to still be watching cartoons.  Of course, I still watched it.  I became a closet Kim Possible fan.  I'm ashamed now that I was ashamed then, and will never attempt to hide my childish side again.

Luckily, I've found friends who are similarly childish at heart.  One of these friends also happens to be my twin (not biologically, but seriously, it's freaky how similar we are) and baking mentor, Kristina.  So when we decided to bake today, it seemed there was only one thing to do: Key-lime Pies and Kim Possible, the ultimate KP adventure.

This recipe is actually for mini Key-lime Pies, and hails from Petite Sweets, a book of mini dessert recipes by Beatrice Ojakangas.  I especially love mini desserts for thr reasons: one, I can eat multiple servings and not feel like a terrible person; and two, I can maybe convince my very health-conscious parents that they are too small to cause any real damage to their diet.  I mean, really, how is it that I live in a household with two healthy parents who won't eat desserts on principle and a brother who doesn't like them?  I've resorted to employing trickery to get my parents to eat them.  I don't think I'll ever succeed with my brother.

This recipe will make 24 bite-sized treats, so line one mini cupcake tin with paper liners and set the oven to 350.  You're going to start by making the graham cracker crust.  You'll need 5 whole graham crackers (10 squares), crushed finely.  This is most easily accomplished with a food processor, though it can be done with a Ziploc bag and a rolling pin if you're extra zealous, have anger issues, or really into manual labor.  Add the crumbs, 2 tablespoons of sugar, and 1/2 stick (4 tbsp) of butter to a skillet and toast them over a burner at medium heat until lightly browned.  I'd recommend at least softening the butter before putting it over the burner; we started with butter straight from the fridge and it took longer than desired to melt. 

Mmmm.... Golden brown and delicious.
Once the graham cracker crust has been sufficiently toasted, take it off of the burner and divide it up between the cups.  You'll have a surprisingly large amount of crust in each cup, but don't worry, that's normal.  Use something flat to tamp down the crumbs - we used a medicine cup that fit perfectly in the tin, but anything could work, so long as the crumbs get compacted.

Fully Tamped.
Once the crust is done, move on to the filling.  I would suggest starting with the lime juice and zest.  If you can, use key limes - they are more acidic and more flavorful than normal limes, though they have a more limited season.  However, I will admit that they are a bitch to work with.  It's not easy to zest something as tiny as a key lime, and juicing it with a regular lemon/lime juicer is right out.  If you happen to have a tiny, key lime-sized juicer, go ahead and use that.  Otherwise, just cut the limes in half and squeeze the juice out of them, straining it before you add it to the filling.  Added bonus: your hands will now smell lime-y fresh for all eternity after working with those dreaded key limes!  Just make sure not to get it in your eyes... trust me on that one.

Kristina, zesting like a boss.
You will need 1/2 cup lime juice and 2 teaspoons grated lime zest for the filling, which is approximately 12 and 7 limes respectively. However, you should zest all 12 of the limes and use the extra zest for garnish later.  If you're not up for juicing all of those limes but still want some of the key lime flavor, try using 1/4 cup of fresh key lime juice and 1/4 cup of store-bought lime juice instead.

Once you've obtained your juice and zest from those pesky key limes, add them to a 2-cup glass measure (or larger) and add one 14-ounce can of sweetened condensed milk and 2 large egg yolks to the mixture.  Mix until well-blended.  Then, pour the mixture into the crumb-lined cups, filling them to the very top (they will sink a little as they set).  You should have just enough filling for all the cups. 

Filled pies.
Bake the pies for 15-20 minutes or until set, then take out to cool thoroughly before topping.  If you have time, I would also chill these, as key-lime pie is best when served cold.  Right before serving, prepare the whipped cream topping.  Whip together 1/2 cup whipping cream, 2 teaspoons sugar and and 1/4 cup pure vanilla extract.  Top the pies with whipped cream and garnish with the extra lime zest. 


Ta da!  The perfectly tart and refreshing summer treat. 

Finished product! Delicious.


Mini Key Lime Pies Recipe from Petite Sweets:

Crumb Crust:
5 double graham crackers (10 squares), finely crushed
2 tablespoons sugar
4 tablespoons (1/2 stick) butter, softened

Put graham cracker crumbs, sugar, and butter into a heavy non-stick skillet over medium heat. Stir and toast until lightly browned.
Line 24 miniature muffin muffin cups with foil liners.  Divide mixture between the cups and tamp down firmly with a spoon or some other tool with a flat end.
Preheat oven to 350.

Lime Filling:
2 large egg yolks
1 (14-ounce) can sweetened condensed milk
1/2 cup fresh lime juice
2 teaspoons grated lime zest (green portion only)

In glass 2-cup measure (or more), mix the egg yolks, milk, juice, and zest until well blended.  Pour mixture into crumb-lined cups, filling them to the very top.
Bake for 15-20 minutes or until set.  Cool thoroughly, then chill.

Topping:
1/2 cup whipping cream
2 teaspoons sugar
1/4 teaspoon pure vanilla extract

Just before serving, whip the cream, sugar, and vanilla.  Spoon the whipped cream over each little pie.  Garnish with lime zest and serve.

Friday, May 20

The BAKED Brownie

There are children living next door to me.

I know that's not really a rare experience.  However, my neighborhood is filled mostly with people my parents age or older, meaning their children are all old and have moved away from home, visiting only on holidays or, like me, when they come home for summer break.  It's been a while since we've had young people in our neighborhood, so it always comes as a bit of a shock to me.  For example, a few days ago I was sitting in our family room, reading, when I heard the unmistakable thuds of a basketball coming from the court in our backyard.  Naturally, I assumed the ghost of Wilt Chamberlain or Air Bud had come to challenge me to a basketball game.  I figured that I could take Wilt, but Air Bud is way out of my league. Maybe I could distract him with a bone or something.  As I searched for a spare ham or squirrel-shaped chew toy, I glanced outside to see tiny arms hoisting a very patriotically colored basketball toward the hoop.  Clearly I jumped the gun on the Air Bud assumption.  In reality, my parents, being the good empty-nesters that they are, told the neighbor kids that they could use our court since we don't really have a use for it anymore.  My dreams of finally defeating Air Bud were dashed.

That evening, our neighbor brought over cookies on this dish.


Cute, right?
Pinned to the top was a note that read "Thak You" (Yes, I understand that it's not spelled correctly. Children wrote it.  It's cute.) and had a flower drawn on it.  It was adorable.
There's something you should know about me.  I'm obscenely competitive.  Even about the smallest, most insignificant things.  So when a neighbor sends over baked goods, I'm not about to send back some half-assed cookies that are left over from some other occasion.  No.  I'm making you something impressive.  What's even worse is that there is absolutely no way that I can compete with the cute factor that came with these cookies.  This is going to take something really special.  Something that doesn't betray the fact that I'm secretly competing either.  Something simple, yet delicious.  Something extraordinary.

The BAKED brownie is just that - extraordinary.  The recipe hails from BAKED's new cookbook BAKED: New Frontiers in Baking. It's without a doubt the best brownie recipe I've ever made.  And what neighbor doesn't love a good brownie?  When you've accidentally burned down the neighbor's fence by throwing your still hot coals from last night's bonfire into the bushes, these are the brownies that you want to bring over. (Yes, that's a true story. Unfortunately, I didn't know this recipe at the time.  Fortunately, they were out of town, giving us time to replace it before they got home.)

What makes the BAKED brownie so good?  It's dense, rich, and full of sweet, chocolately depth.  Make sure you use high-quality chocolate and cocoa for this brownie - trust me, it's worth the splurge. 

Start by preheating your oven to 350 and buttering a 9 by 13 inch glass or metal baking pan. Whisk together 1 1/4 cup of flour, 1 tsp of salt, and 2 tsp of cocoa in a medium sized bowl.  Like I said, make sure you use high-quality cocoa for this.  I don't buy into the hype for dutch-processed cocoa powder, but I do believe in a dark-colored unsweetened cocoa powder.  If your cocoa powder is light or grey-ish, I'm sorry, but it's just not going to be the same.  I used Ghirardelli cocoa and chocolate for this recipe, and I love the way it turned out.  Set flour mixture aside.

Coarsely chop 11 ounces of dark unsweetened baking chocolate (I used 70% Ghirardelli chocolate, but others would work so long as it's 60-72% chocolate).  The added benefit of Ghirardelli chocolate here is that it's easy to break, so you can just break with your hands instead of chopping.  Cut 1 cup (2 sticks) of butter into about 1 inch pieces.  I would recommend room temperature butter, as it'll speed up the melting process.  
 

Look at all that chocolatey goodness. And the butter doesn't hurt either.

Put the butter, chocolate pieces, and 1 tsp of instant espresso powder (NOT the same as ground espresso or instant coffee - look for Medaglia d'Oro brand) into a large metal bowl, and place the bowl over a saucepan of simmering water (I used medium heat, but adjust as necessary to melt without burning the chocolate).  Stir occasionally until the chocolate and butter are completely combined.  By this time, your kitchen should smell like a chocolate crack den.  Be careful not to slip into a sugar coma.

Turn stove off, but keep the bowl over the saucepan.  Add 1 1/2 cup granulated sugar and 1/2 cup packed light brown sugar, and whisk until thoroughly combined.  Take the bowl off of the saucepan, and add 3 room temperature eggs.  Get the italics?  It's important that the eggs are room temperature.  Whisk eggs until combined, but no farther.  Add 2 more room temperature eggs, whisking until combined.  Make sure you don't overbeat the eggs here, or your brownies will be too cakey.  Now put that whisk away.  You don't want it anymore.  Seriously, throw it in the sink or something.

Stir in 1 tsp of vanilla with a spatula (don't take that whisk back out!), then add the flour mixture to the chocolate mixture and stir until just combined.  Pour into your prepared pan, and set in the oven.  Lick bowl clean.  This brownie batter is too good to waste.  Cook for 30 minutes, checking a few times before it is done.  You don't want to overbake this brownie.  I would say to wait for it to cool to cut, but I know that I can't expect that kind of restraint from any of you. 


We cut ours fresh out of the oven... and they were delicious.
There you have it. The BAKED Brownie.  Take that, children.


Finished product!


For good measure, here's the full recipe:

1¼ cups all-purpose flour
1 teaspoon salt
2 tablespoons dark unsweetened cocoa powder
11 ounces dark chocolate, coarsely chopped
1 cup (8 ounces) unsalted butter, cut into 1-inch pieces
1 teaspoon instant espresso powder
1½ cups granulated sugar
½ cup packed light brown sugar
5 eggs, at room temperature
2 teaspoons vanilla extract

1. Preheat the oven to 350 degrees F. Butter the sides and bottom of a 9×13-inch glass or light-colored baking pan.

2. In a medium bowl, whisk the flour, salt, and cocoa powder together.

3. Put the chocolate, butter and instant espresso powder in a large bowl and set it over a saucepan of simmering water, stirring occasionally, until the chocolate and butter are completely melted and smooth. Turn off the heat, but keep the bowl over the water and add the sugars. Whisk until completely combined, then remove the bowl from the pan. The mixture should be room temperature.

4. Add 3 eggs to the chocolate mixture and whisk until combined. Add the remaining eggs and whisk until combined. Add the vanilla and stir until combined. Do not overbeat the batter at this stage or your brownies will be cakey.

5. Sprinkle the flour mixture over the chocolate mixture. Using a rubber spatula (not a whisk), fold the flour mixture into the chocolate until just a bit of the flour mixture is visible.

6. Pour the batter into the prepared pan and smooth the top. Bake in the center of the oven for 30 minutes, rotating the pan halfway through the baking time, until a toothpick inserted into the center of the brownies comes out with a few moist crumbs sticking to it. Let the brownies cool completely, then cut into squares and serve.

7. Store at room temperature in an airtight container or wrap with plastic wrap for up to 3 days. (Yeah, right).


Thursday, May 19

Intro to Cinnamon and Cynicism

Hello, there, blogosphere.

If you're here, then you've probably realized that I've decided to start a blog.  If you know me, you're probably wondering why in hell I would ever decide to do such a thing.  You're probably thinking that no one but escaped mental patients and agoraphobics would ever want to read my thoughts. And you're not positive about the agoraphobics.  Now that you think about it, you're not sure that agoraphobics even read blogs.  But if they did, they'd be skeptical about this one.  Ah, but here's the thing: I have a secret weapon.  I know how to reach into the hearts and souls of every human being until they forget that a second ago they were wondering if I was the spawn of Satan himself, and I only need one word.

Cookies.

You heard me. Cookies.

I'll add a few more words this time: pies, bars, brownies, breads, cakes, candy, and cookies.  Oh so many cookies.  I've got cookie recipes up the wazoo, and I don't even know what a wazoo is.  Of course, I'm no innovator.  I'm a 20-year old college student and an amateur baker at best, but I do know how to find delicious recipes.  The kind of recipes that make you want to quit your job, buy 20 ovens, and bake all day just to be surrounded by these sinful sweets.  Add in the fact that I'm at home for the summer with the potential to be jobless for 3 months, and you get one hell of a baking site.  And just to cut that sugar coma that you're bound to go into after making all of these delicious recipes for yourself, about half of my posts will simply be my random thoughts, complaints, and sarcastic comments.  Feel free to skip those posts for the desserts (that's what I would do, but trust me, I don't need an extra dose of cynicism), but be warned, without the proper sarcasm barrier, you may just contract diabetes simply from reading the posts.

So welcome, all, to Cinnamon and Cynicism.  First baking post will follow shortly.